Desktop License🔗
A valid and active license needs to be installed in order to access Modelon Impact and the Modelon libraries.
Note
Modelon is not selling Desktop license anymore. However, the existing customers can contact Modelon support for license related issues (support@modelon.com)
About Modelon Impact licenses🔗
Modelon Impact Desktop uses Flex licensing mechanism and is only available in the node-locked licensing model. A node-locked license enables the use of Modelon Impact on a single machine and is locked based on the machine's MAC address.
Note
If you are interested in other licensing options, please reach out to Modelon Sales.
The node-locked license file provided by Modelon will look similar to the example below:

The license file will contain the host ID (MAC address) which you provided when purchasing the license. In the example above, the MAC address is AF10D89C8E90.
Installing a node-locked license🔗
To execute these steps, you need:
- A valid Modelon Impact license
- Modelon Impact installed
Steps to install node-locked license🔗
- Close Modelon Impact if it is already running.
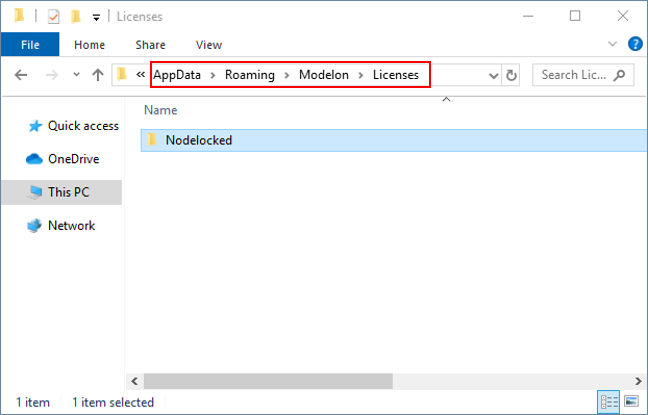
- Open the Application Data folder.
- Open the Start menu.
- Type %appdata% and press Enter.
- The Application Data folder should now be open. Check that its path is of the form C:/Users/<username>/AppData/Roaming.
- Create the folder Modelon/Licenses/Nodelocked if it does not exist already.
Note
Please make sure that the folder path contains only English letters.
- Paste your license file (.lic) in the Nodelocked folder.
Info
You don't have to upgrade the license when installing a new release of Modelon Impact.
Basic troubleshooting🔗
Some common mistakes that are associated with license files are:
- The license file is accidentally placed in the wrong AppData folder. The node-locked license file should be placed in C:\Users\<username>\AppData\Roaming\Modelon\Licenses\Nodelocked.
- An incorrect host ID or MAC address (often that of a dongle) is provided to the Modelon Sales team for license generation.
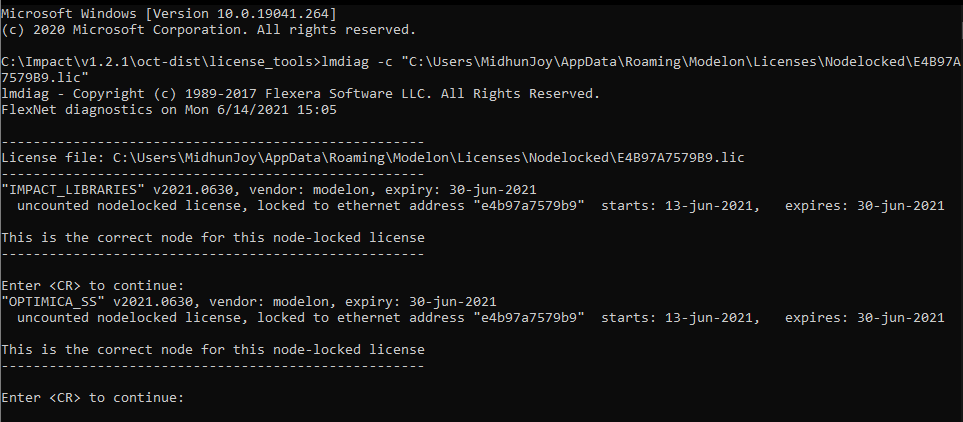
Quick diagnosis of license issues is possible using FlexLM tools that are included along with the Impact installation.
-
Browse to the license tools folder that is included with Modelon Impact (<InstallationDirectory>\oct-dist\license_tools), open the command prompt, and utilize the lmdiag tool using the command:
lmdiag -c "<path to your license file>".-
Expected output if the license file is installed correctly:
-
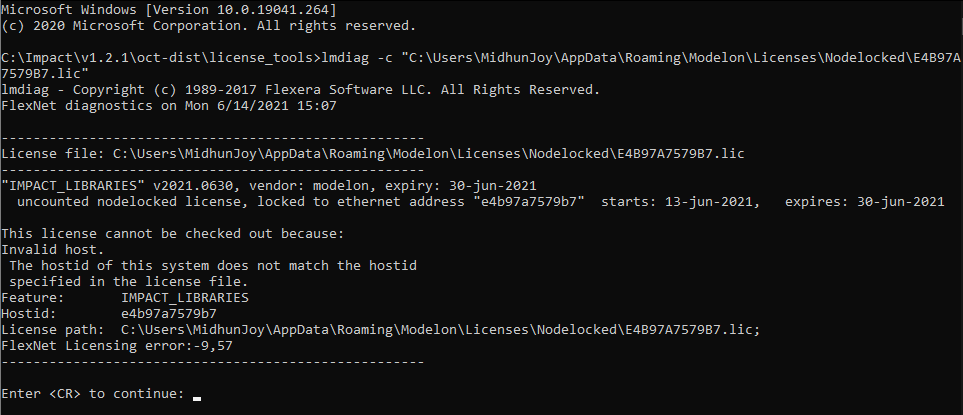
Output if host ID is incorrect:
-
Tip
Make sure to include the license file name in <path to your license file> when using the lmdiag command. For example, C:\Users\<username>\AppData\Roaming\Modelon\Licenses\Nodelocked\AA11AA11AA11.lic.
Before contacting Modelon🔗
To resolve your issue as quickly as possible, please provide answers to the following questions when contacting Modelon Support (support@modelon.com).
- Are you running other applications that use the FlexNet Publisher license system?
- Do you have licenses from multiple vendors in the same license file? If yes, please attach the license file when contacting Modelon.
Please also provide the output from running the lmdiag command.
Application🔗
To ensure a great experience, review our minimum system requirements, and then get started by downloading and installing Modelon Impact on your device.
Note
Modelon Impact Desktop is only available for Windows computers today.
Step 1: Download the Modelon Impact installer🔗
-
Download the Modelon Impact installer as per instructions from the Sales Team (sales-admin@modelon.com). You typically receive a download link along with a license file and user credentials which allow you to log in, for example, https://downloads.modelon.com/Impact. The content available at the link provided to you is the Modelon Impact + Libraries installer (.msi file). Download and save this installer on your laptop or computer.
Note
The installer will also install necessary prerequisites such as the Optimica Compiler Toolkit, Python and Node.js.
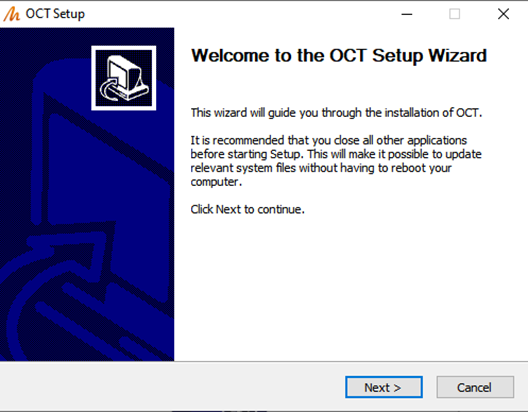
Step 2: Run the installer🔗
-
Double-click on the
ModelonImpact-xxxxxx.msiinstaller to bring up the Installation Wizard, and follow the prompts to install Impact.Note
You may need to run the installer with Admin privileges.
The installation consists of the following steps:
-
Read through and accept Modelon's License Agreement terms.
-
Choose the default installation directory (
C:/ModelonImpact.xx.x) or specify one of your choices.
Note
Please make sure that the installation path contains only English letters.
-
Select the libraries that you want to install. A Pro license gives the right to use ALL Modelon Libraries whereas a Base license only allows the use of the Modelica Standard Library; refer to the licensing section for more details.

-
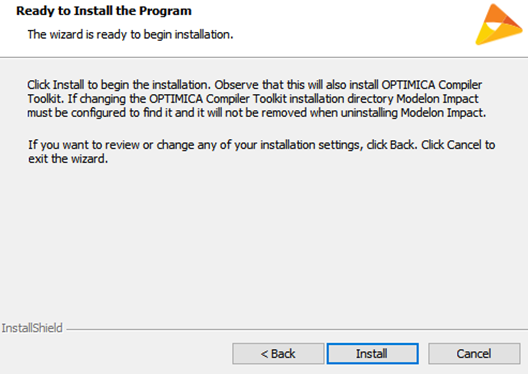
Clicking Install will prompt installation of “OCT” – Optimica Compiler Toolkit.
-
Choose the desired folder in which Optimica Compiler Toolkit (OCT) has to be installed. By default, this is a folder within the Impact installation directory chosen previously, for example,
C:/ModelonImpact_xx.x/oct-dist.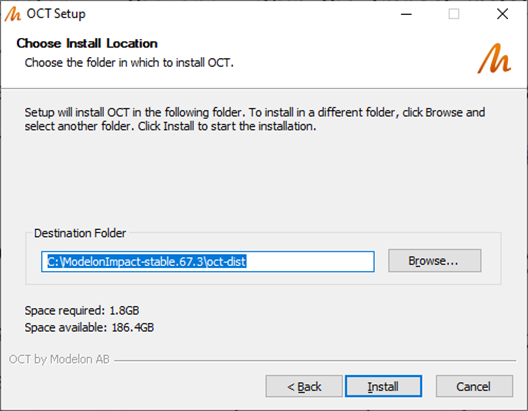
-
Follow the prompts to install OCT.
- Once OCT is installed, follow the additional prompts for installing Modelon Impact.
Note
The installation process will take approximately 15-20 minutes depending on the computer hardware. This is because the installation of OCT includes a large number of files including an entire Python distribution.
-
Step 3: Open Modelon Impact🔗
-
Once the installation is complete, check the Launch Modelon Impact checkbox and click Finish to launch Modelon Impact locally.
Note
You need to have a valid license to be able to start the server properly.
The other option is to start the Impact server from Windows Start Menu or the installation folder, e.g.
C:/ModelonImpact_xx.x/Impact-Launcher.exe.An example of the successful start of the server within the command window is shown below.
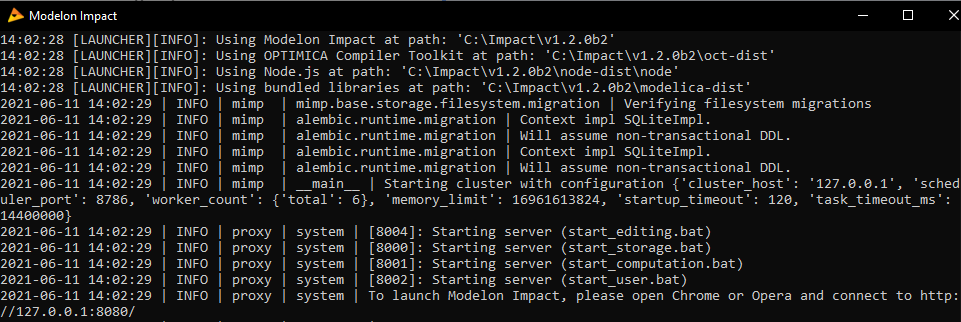
Note
This command window/server console logs useful information while the user works within the web browser. The logs are also written to file and are available at
C:\Users\<username>\impact\logs. -
Launching Modelon Impact should automatically open a Chrome window with the URL http://127.0.0.1:8080. A Modelon Impact welcome screen like the one below should load, confirming the proper installation.
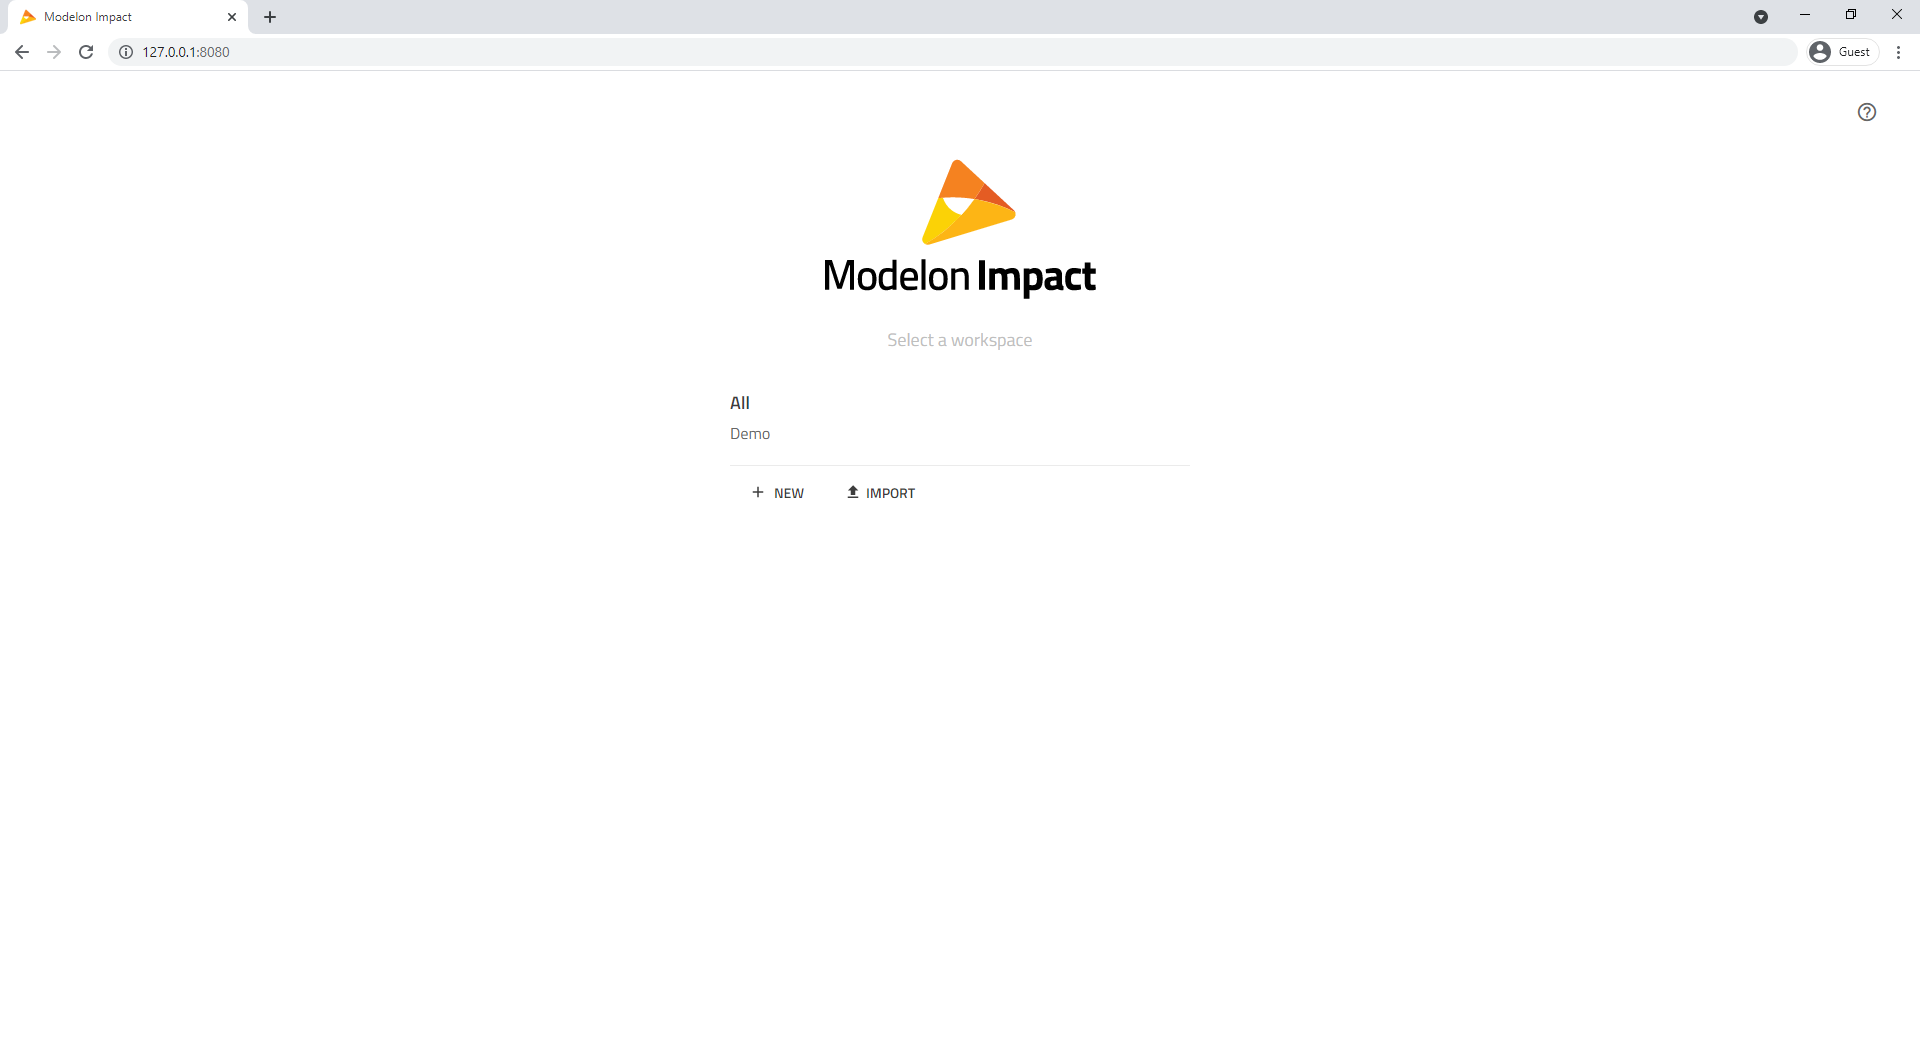
Failure
Installation problems? Make sure that you have installed a license. Contact Modelon Support (support@modelon.com)) if you still can't get Modelon Impact up and running.
You're now ready to explore Modelon Impact!
Step 4: Advanced configuration using environment variables (Optional)🔗
The below table lists a few useful environment variables that allow users to modify/configure some default settings for Modelon Impact. The environment variables can be defined as "user" variables in Control Panel.
-
From the Windows taskbar, search for "edit environment variables." This should give a shortcut to a Control Panel page - Edit environmental variables for your account - as a result. Open that link to get to the Windows Environment Variables dialog.
-
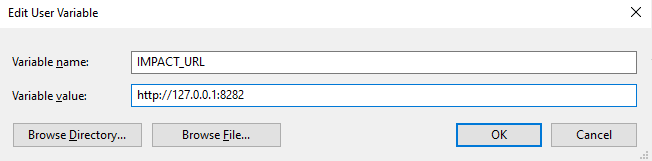
Click New... under user variables, and in the prompt that follows, fill in the name and value as per the table below; see the image below for example.
Info
Declaration and use of these environment variables are not typically needed; the standard Modelon Impact installation process described above should work out of the box for most users.
| Environment Variable | Default Value | Example Overridden Value | Description |
|---|---|---|---|
IMPACT_BASEDIR |
C:\Users\<username>\impact |
C:\Users\<username>\Documents\impactdir |
This variable changes the base directory where all Modelon Impact artifacts are stored. |
IMPACT_COMPILATION_JVM_MEM_OPT |
-Xmx4g |
-Xmx8g |
This variable changes the memory allocated to the compilation service of Modelon Impact. |
IMPACT_EDITING_JVM_MEM_OPT |
-Xmx4g |
-Xmx8g |
This variable changes the memory allocated to the editing service of Modelon Impact. |
IMPACT_LOG_LEVEL |
INFO |
ERROR |
This variable controls the level of logging output to the Modelon Impact server console and written to the log files. Possible values are ERROR, INFO and DEBUG. |
IMPACT_URL |
http://127.0.0.1:8080 |
http://127.0.0.1:8282 |
This variable changes the default URL and port used by the Modelon Impact service. This is useful, for example, if the default port (8080) is used by another service. |
IMPACT_WORKER_COUNT |
max(1, CPU_COUNT//2) |
8 |
This variable controls the number of worker processes available, and CPU_COUNT is defined as “available CPU count for this system.” |