JupyterLab🔗
JupyterLab is available from the Apps menu. It allows running Jupyter notebooks to interact with Modelon Impact. For more information about JupyterLab, see the JupyterLab documentation.
Run a Jupyter Notebook🔗
To run a Jupyter notebook in JupyterLab, find the notebook in the file browser, double-click it to view it, and hit the 'play' button to run the notebook cell by cell, or the 'fast forward' button to run the entire notebook.
Visual Studio Code🔗
Modelon Impact integrates an open-source in-browser version of the popular
VSCode (Visual Studio Code) editor.
The integration relies on the work done by Code server
project. This integration provides an option for experienced users to perform advanced operations:
- File browser - browse through the files on your user disk on JupyterHub
- Advanced version control operations
- Opening a Terminal window
- Adding / Removing Extensions
Note
Only extensions published in Open VSX registry are available. Microsoft proprietary extensions cannot be used.
Version Control in Visual Studio Code🔗
This section provides some tips for how to do version control operations which are currently not supported by the Modelon Workspace Management using Visual Studio code.
View differences between local vs. remote🔗
For a version-controlled repository, the differences between the local working copy with the remote repository can be viewed file by file. To do this:
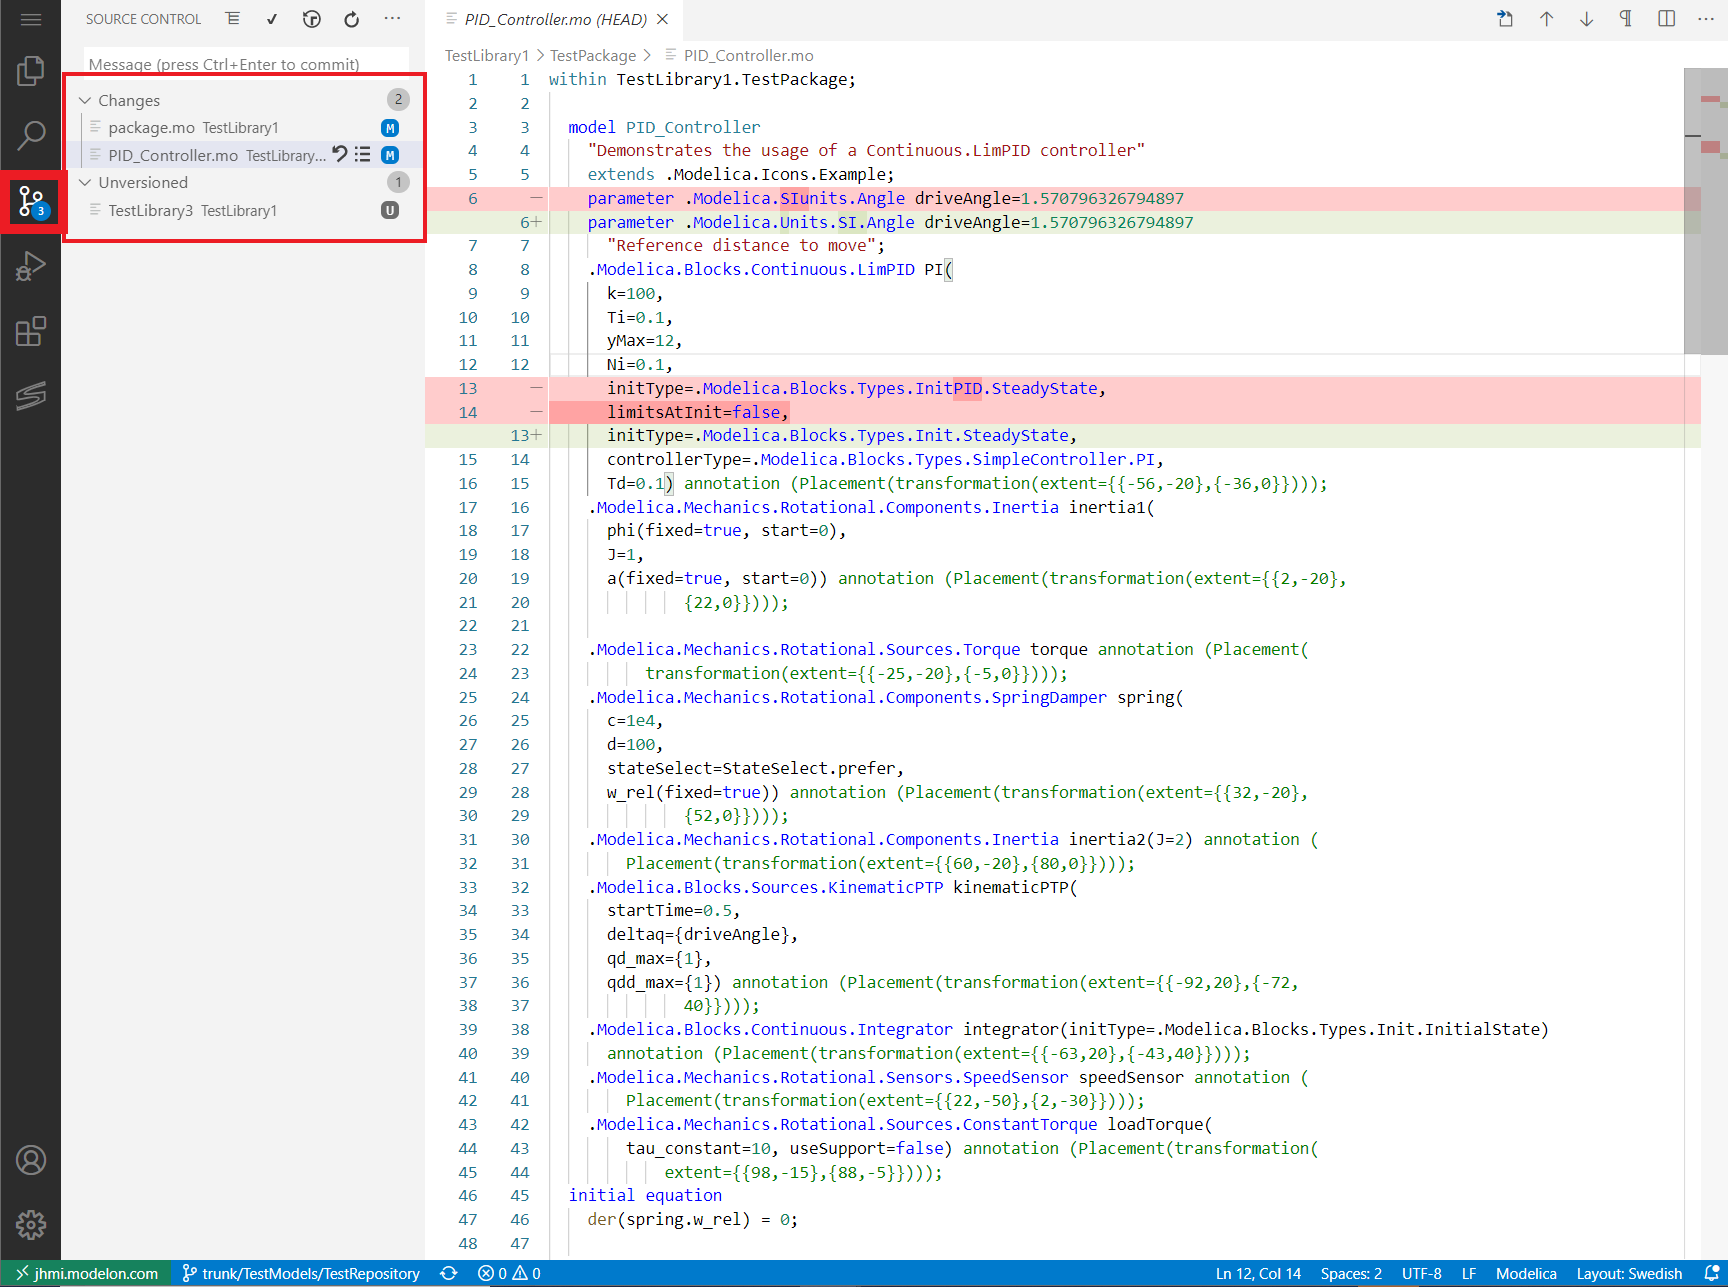
- Go to the "Source control" view in the left sidebar in Visual Studio Code
- Click the file in the list of changed files to view the diff.
Edit conflicts🔗
When there are conflicts between the local modifications to the working copy and remote updates, these can be edited file by file, conflict by conflict, in Visual Studio Code.
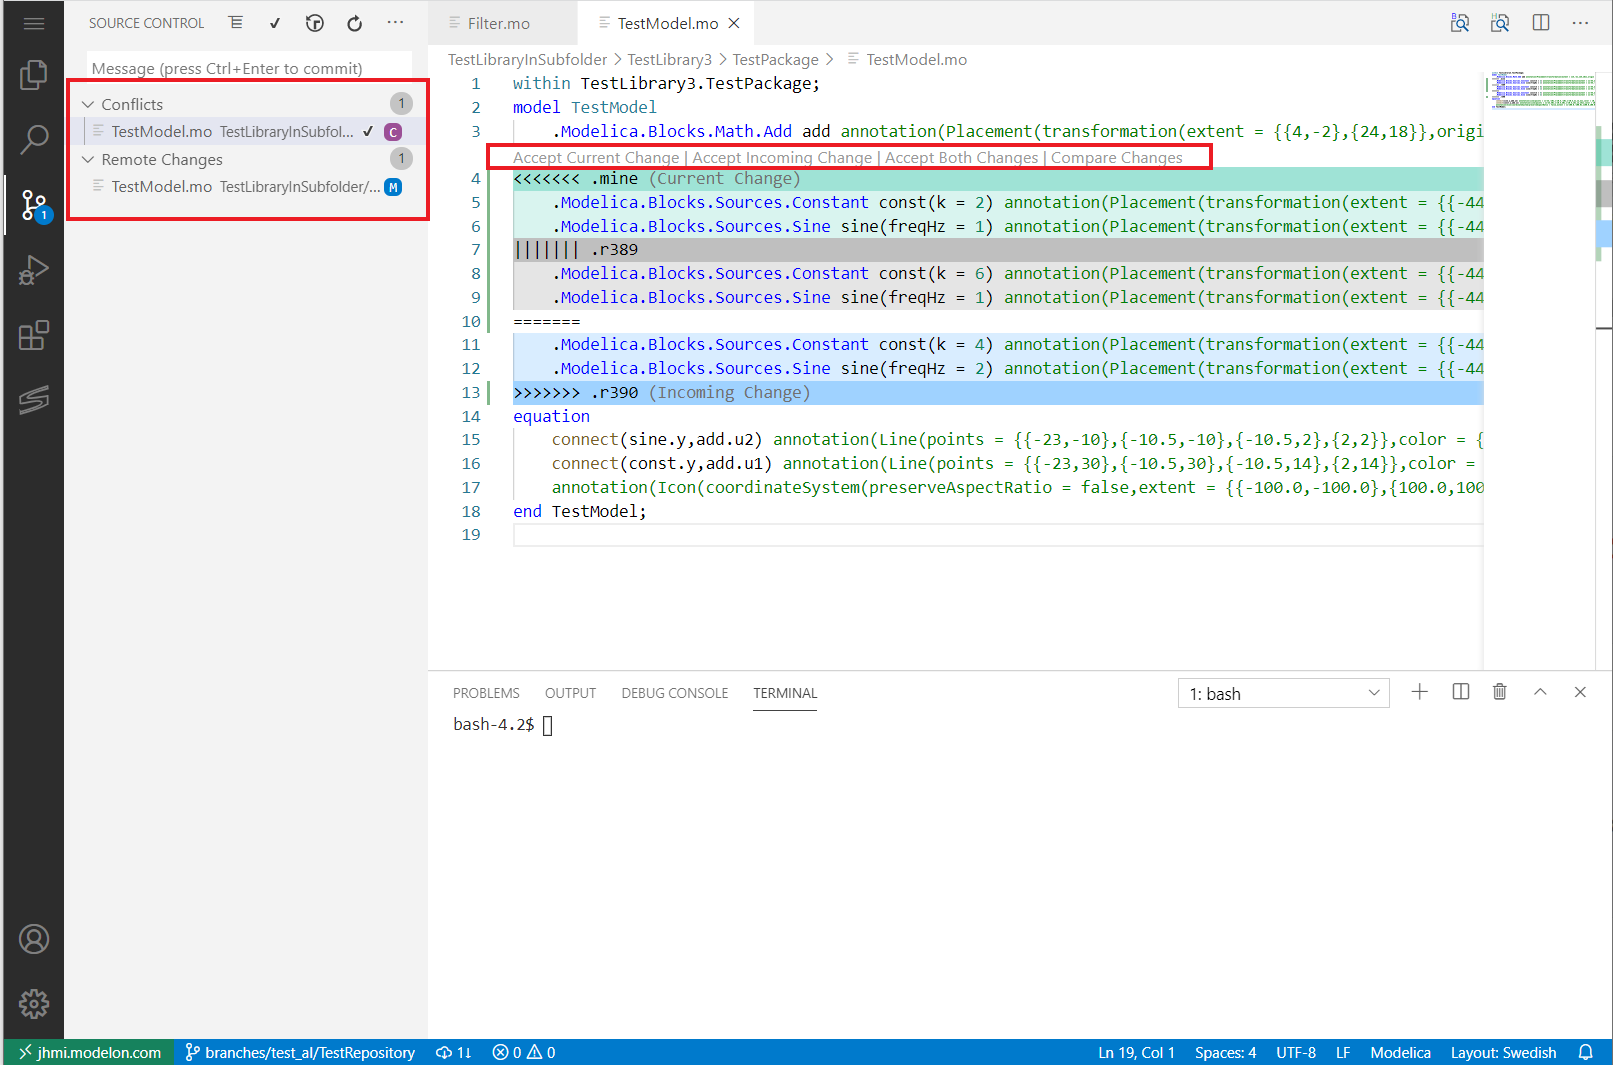
- Go to the "Source control" view in the left sidebar in Visual Studio Code
- Click on a conflicted file in the list of changed files to view the diff
- For each conflict, select any of the options to resolve the conflict, e.g. "Accept Current Change". The code can also be edited manually.
- When all conflicts in the file have been resolved, Visual Studio code requests to mark the conflicted file as resolved. Click "Yes" to mark the conflict in this file as resolved.
- Do steps 2-4 for all conflicted files in the list (marked by "C"). All conflicts are now resolved and any changes can be committed from the Workspace Management
Server Management🔗
The Server management is available from the Apps menu. Alternatively (i.e. for Deployment users) it can be reach using this URL: "...[username]/impact/customizations/workspace_management/index.html?view=settings"
This page provides basic information about the versions of Modelon Impact and the Workspace Management app and their current storage usage.
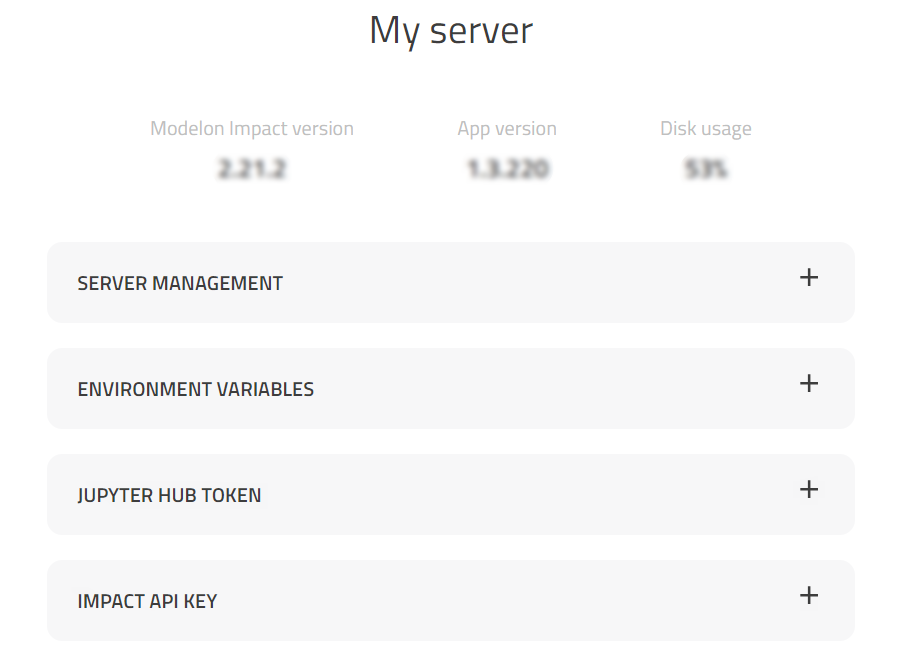
It also allows to:
- Log out from JupyterHub and stop the single-user server.
- Set environment variables for Modelon Impact, including custom functions, via VSCode editor
- Restart the Modelon Impact server in the user space (button available through "Environment variables")
- Access the dialog for JupyterHub API token management via easy to find link
- Check and generate Modelon Impact API key. The API key is required when working with REST API, e.g., via Modelon Impact Python client. The key is cached in the user disk and automatically used by the client code when working from the same Modelon Impact environment.
Set Environment Variables🔗
Setting environment variables for Modelon Impact is done via Server management page.
Choose ENVIRONMENT VARIABLES and click on Set environment variables using VS Code. This will open the hidden /home/jovyan/.impact folder where you can find setenv.sh file.
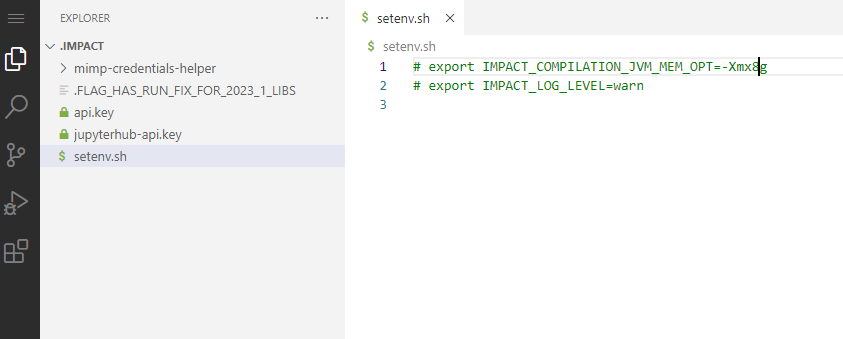
The setenv.sh file is executed before the startup of the Modelon Impact controlled computation environment. It can be used to, e.g., set environment variables affecting OCT Modelica compiler, e.g., to Allocate More Memory. Note that this file is not executed before the startup of Jupyterlab and does not affect environment variables for Python scripts and notebooks running outside of the Modelon Impact computation engine.
Allocating More Memory🔗
Some models need more memory allocation for successful compilation. To allow
OCT Modelica Compiler under Modelon Impact on cloud to use more memory.
You need to set environment variable IMPACT_COMPILATION_JVM_MEM_OPT.
In order to do that:
- Go to Server management in the Apps drop-down.
- Choose ENVIRONMENT VARIABLES and click on Set environment variables using VS Code. This will open a folder where you can find "/home/jovyan/.impact/setenv.sh" file including all environment variables.
-
Add a row to allocate more memory, e.g., to allocate 8GB RAM instead of the default 4GB:
export IMPACT_COMPILATION_JVM_MEM_OPT=-Xmx8g -
Save this file (CTRL+S).
- Restart the server using the "Restart Impact" button on the Server management page.
Note
Setting the environment variable will make Modelica compiler try to allocate more memory. This does not change the hard memory limit set by your execution environment. Please, consult the operations team for information on the hard memory limits in your environment.