Electric Vehicle🔗
Introduction🔗
An electric vehicle (EV) is a vehicle that uses one or more electric motors or traction motors for propulsion. Commonly, the term EV is used for an electric car. Nowadays, EVs have seen a resurgence due to technological developments, and an increased focus on renewable energy.

Modelon’s Electrification Library is a multi-physics Modelica library for the design, analysis, verification, and control of electrified systems. The library is suitable for a wide variety of electrical applications including ground vehicles, aircraft, personal mobility, auxiliary power electric storage systems, and other complex engineered systems.
Before we start🔗
You will need approximately 20-30 minutes to finish all tutorial steps.
What are we building?
In this tutorial we will show how to build a simple EV model consisting of all essential parts.
You will learn how to:
- Build an ideal EV model (no losses)
- Run and post-process the model
- Implement heat losses
Build EV🔗
We will show how to build a simple EV model consisting of all essential parts.
Powertrain components🔗
We will build an electric vehicle model from scratch.
-
Create a new model electric_vehicle.
-
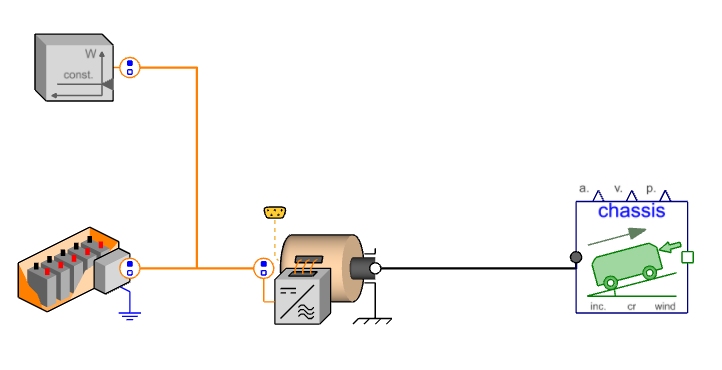
Add below components (parts) on your electric vehicle model canvas:
Electrification.Batteries.Examples.Lumped
Electrification.Machines.Examples.Machine
Electrification.Mechanical.SimpleChassis1D
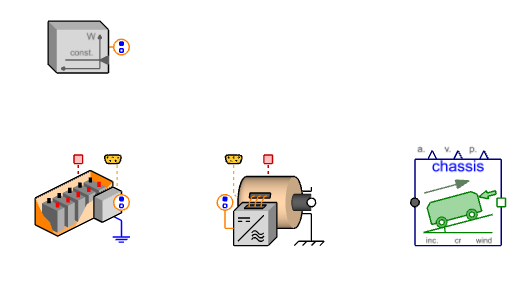
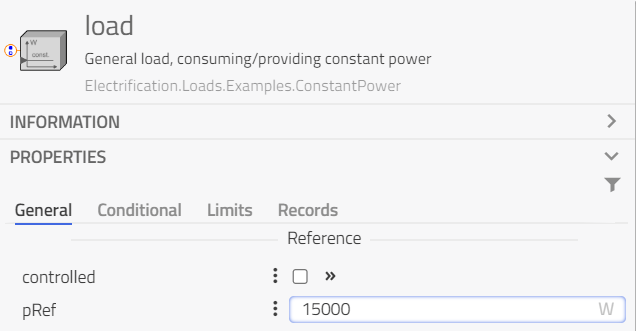
Electrification.Loads.Examples.ConstantPower
-
Flip battery and constant power components horizontally and connect all parts together.
-
Rename them to:
battery
machine
chassis
load
 Constant load🔗
- Set the load power to 15kW, through: pRef = 15000 W.
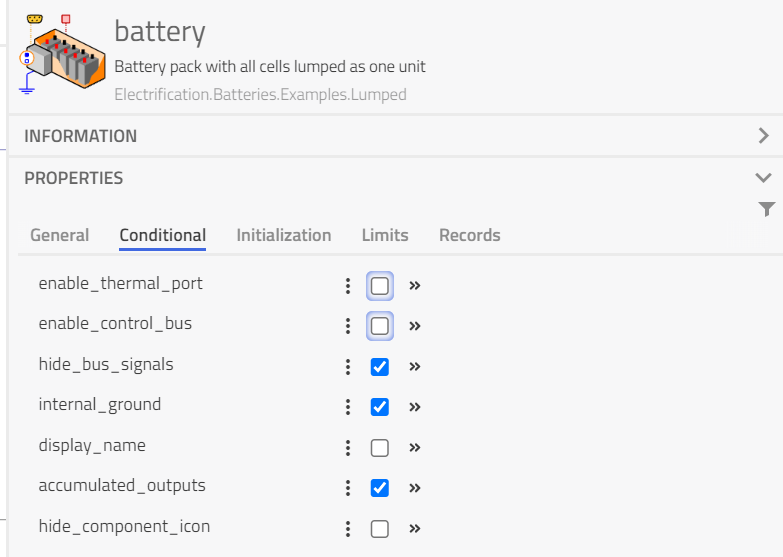
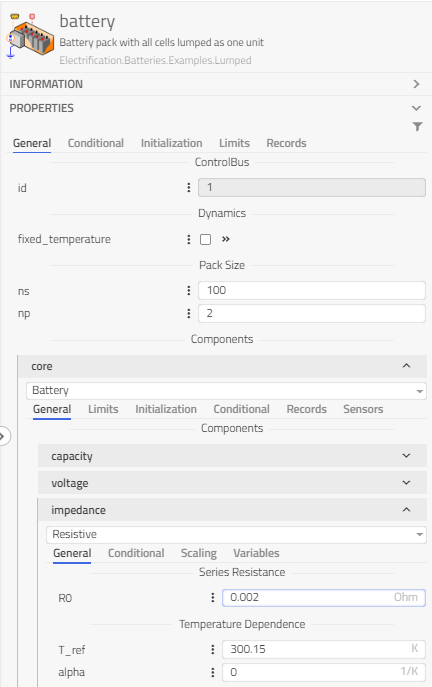
 Battery🔗
- Disable the thermal and control ports in battery > Conditional > enable_thermal_port and enable_control_bus.
-
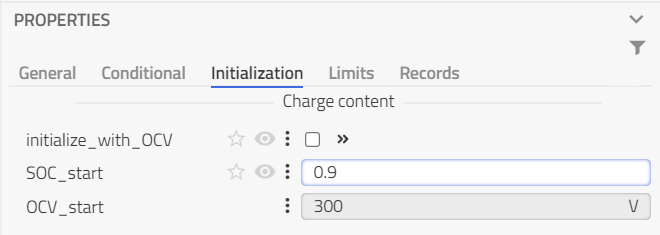
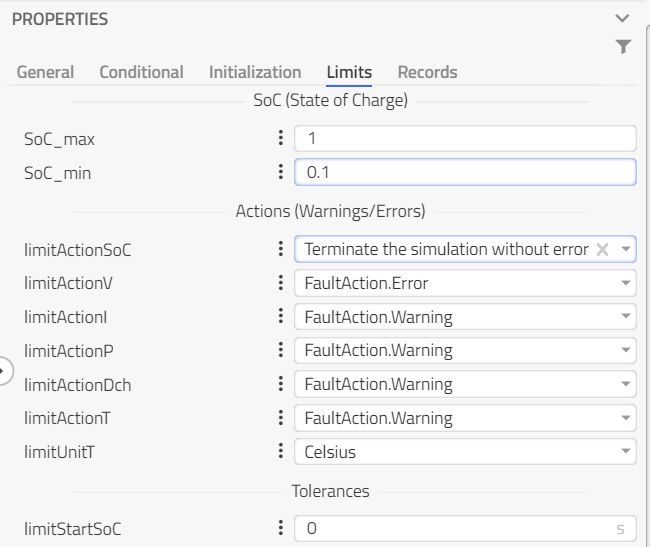
Set battery limits and initialization:
- battery > Initialization > SOC_start: 0.9
- battery > Limits > SoC_min: 0.1 (check SoC_max: 1)
- battery > Limits > limitActionSoC: Terminate (
Modelon.Types.FaultAction.Terminate)
- Use a fixed battery temperature:
- battery > General > fixed_temperature: true
- battery > General > thermal > General > T0: 20 degC (293.15 K)
Tip
Click here to learn how to change the global units.
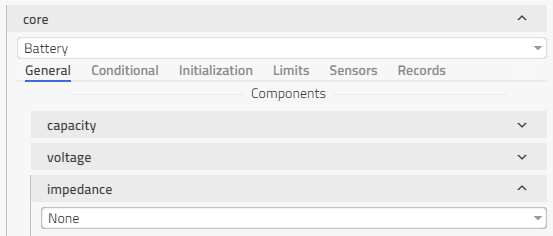
- Configure the battery to not have any losses, by battery > General > Core > General > Impedance to None (
Electrification.Batteries.Core.Impedance.None).
 Machine (Motor)🔗
- Disable machine thermal port, by machine > Conditional > enable_thermal_port: false

-
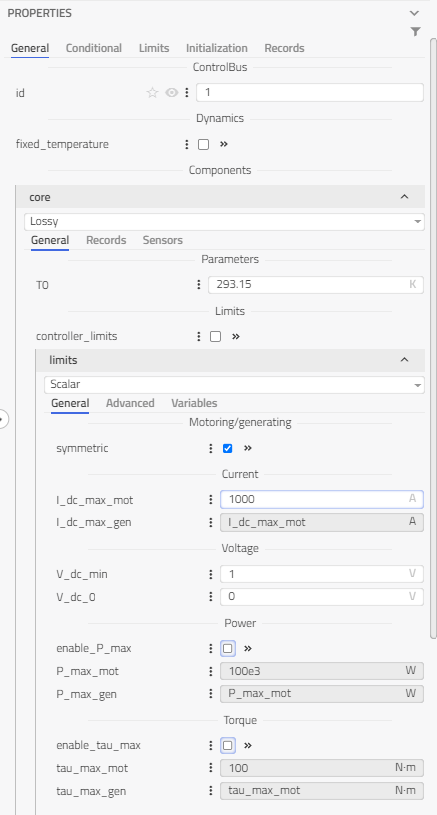
Disable the machine torque and power limits:
- machine > General > core > General > limits > enable_tau_max: false
- machine > General > core > General > limits > enable_P_max: false
- Set the machine current limit to 1000 A, by machine > General > core > General > limits > I_dc_max_mot: 1000.
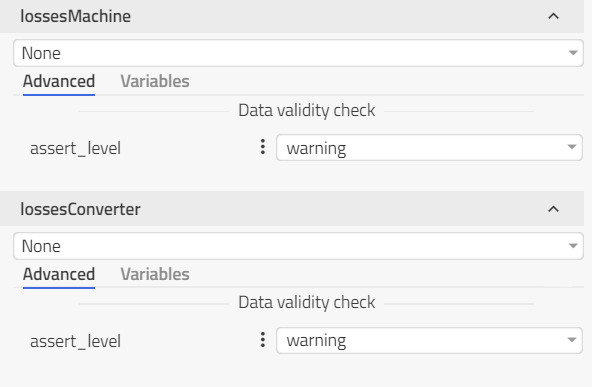
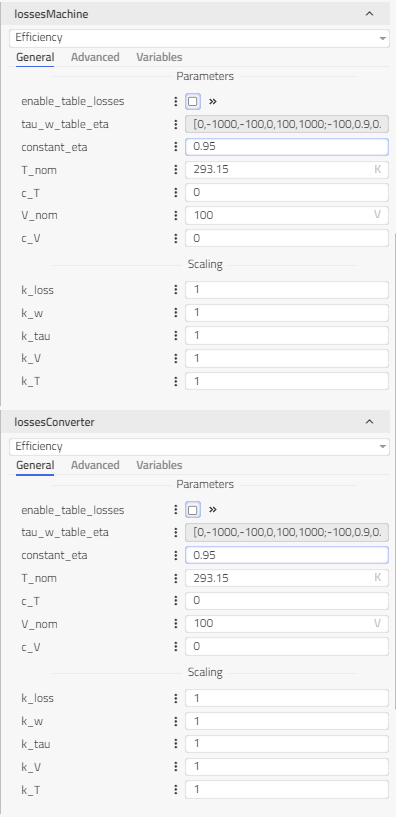
- Configure the machine to have no losses, by setting machine > General > core > General > lossesMachine and lossesConverter to None (
Electrification.Machines.Core.Losses.None).
-
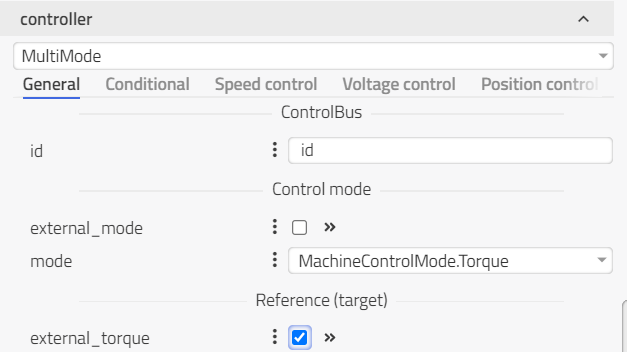
Configure the controller of the machine to use the external torque control signal as reference:
- machine > General > controller > General > external_torque: true
- make sure that mode is set to
MachineControlMode.Torque.
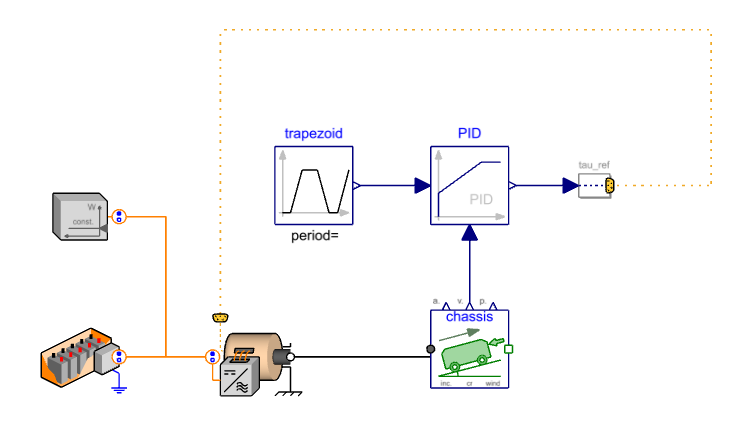
Control components🔗
We will design a control network with PID controller adjusting the vehicle speed to follow the given velocity profile.
-
Add below components (parts) on your electric vehicle model canvas:
Modelica.Blocks.Sources.Trapezoid
Modelica.Blocks.Continuous.LimPID
Electrification.Machines.Control.Signals.tau_ref
-
Connect them together as shown below.
 Speed target🔗
-
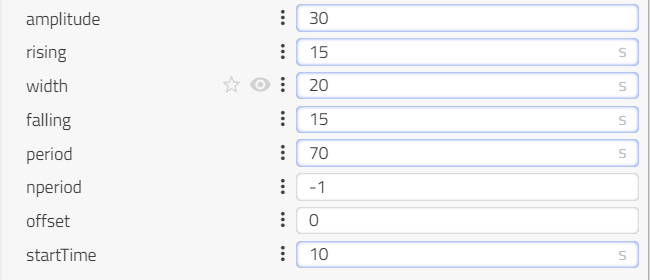
Rename the trapezoid component to speedTarget and set the following parameters:
- amplitude: 30
- rising: 15 s
- width: 20 s
- falling: 15 s
- period: 70 s
- startTime: 10 s
 PID controller🔗
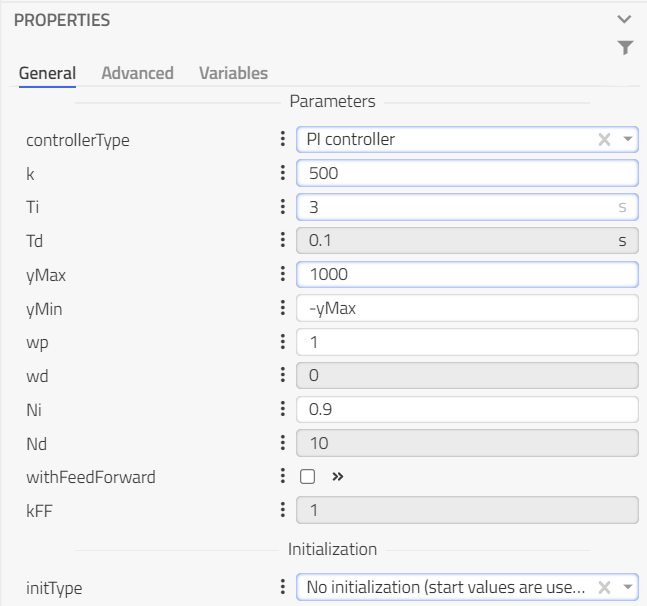
-
Rename the PID component to speedPI and use the following parameterization:
- controllerType: PI controller (
Modelica.Blocks.Types.SimpleController.PI) - k: 500
- Ti: 3
- yMax: 1000
- initType: NoInit (
Modelica.Blocks.Types.InitPID.NoInit)
- controllerType: PI controller (
 Torque reference🔗
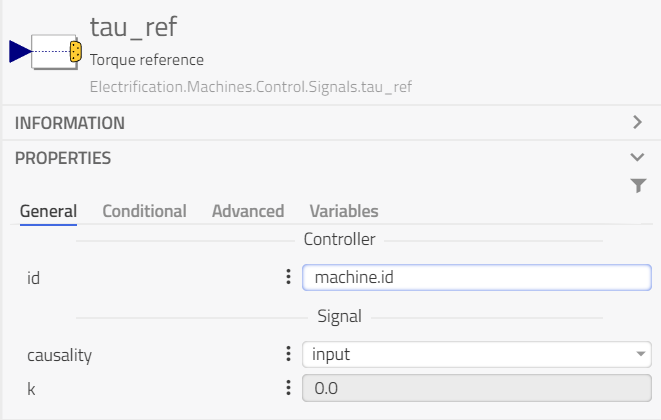
- Set the id of the torque reference signal to machine.id as shown below.
Congratulations, you have constructed a simple electrical vehicle model!
Run and post-process🔗
As the model is ready now to simulate we can now run it and plot some important variables.
No losses run🔗
-
Go to the Experimentation mode.
-
Set the simulation stop time to 10 000 s, and let the simulation run until it stops due to low battery SoC. The simulation should stop before 10 000 s since the battery is empty (SoC drops to 0.1).
-
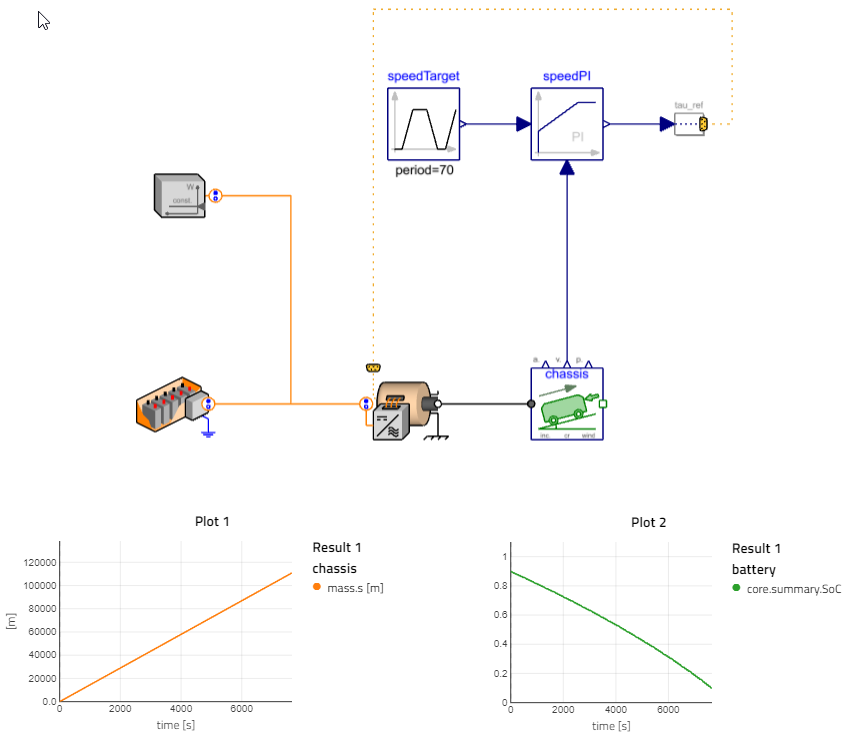
Plot the vehicle position and battery SoC:
chassis.mass.sbattery.core.summary.SoC
Tip
Learn how to create a plot here.
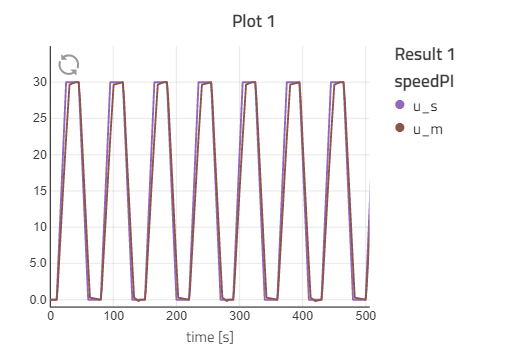
In the following plots we have zoomed in to make the results more visible. The Time frame showcased it from 0 s to approximately 500 s.
-
Plot the target (set-point) and measured vehicle velocity:
speedPI.u_sspeedPI.u_m
-
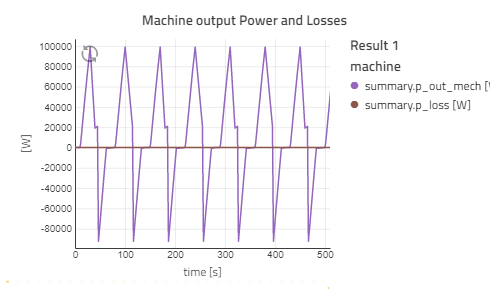
Plot the machine output power and losses:
machine.summary.p_out_mechmachine.summary.p_loss
-
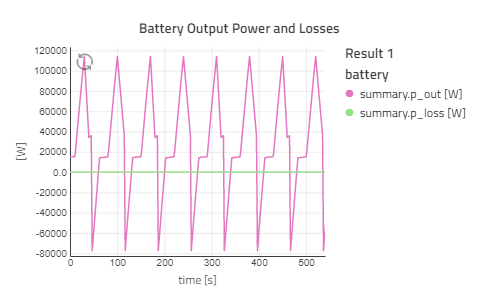
Plot the battery output power and losses:
battery.summary.p_outbattery.summary.p_loss
- Save the View as Basic View to be able to recreate the plots easier at a later stage..
Tip
Click here to learn how to create and work with views.
Heat losses🔗
We will enhance the EV model by adding losses to battery and machine making it more realistic.
-
Duplicate the model within your workspace and rename it to electric_vehicle_losses.
-
Configure battery to have fixed resistive losses of 2 milli-Ohm per cell by adjusting battery > General > core > General > impedance to Resistive (
Electrification.Batteries.Core.Impedance.Resistive) and setting R0: 0.002 Ohm.
- Configure the machine and inverter efficiency to 95 % by:
- Set machine > General > core > General > lossesMachine and lossesConverter to Efficiency (
Electrification.Machines.Core.Losses.Efficiency), and disable table losses by enableTableLosses: false. - constant_eta: 0.95 for both lossesMachine and lossesConverter.
- Set machine > General > core > General > lossesMachine and lossesConverter to Efficiency (
-
Simulate the model again, until it stops.
-
Rename Result 1 to No Losses.
-
Rename Result 2 to Losses.
-
Compare the battery SoC of these two simulations by plotting
battery.core.summary.SoC.
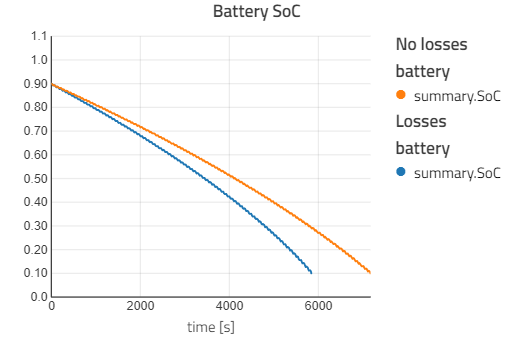
As expected, the model with losses does not travel as far as the one without losses and the battery discharges faster.
Congratulations, you have successfully finished the simple electric vehicle model with and without losses.